As you could read in the first blog hetsecurityoffice.nl runs on AWS services. The domain itself is registered in Route53 and it does not come with an email server and email addresses.
This needed to be fixed. Once again I wanted something:
- that requires zero maintenance of infrastructure
- that is secure by design
- that has virus and spam scanning features out of the box
- that scales forever
- low cost at high volumes
The idea
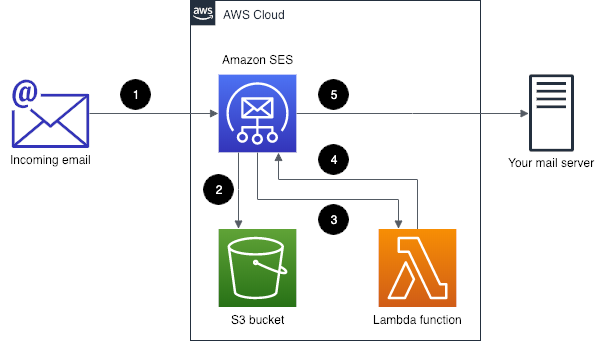
- An email is sent to the hetsecurityoffice.nl domain and that is picked up by Simple Email Service.
- Simple Email Service writes the email to a S3 bucket.
- Simple Email Service triggers Lambda that an email has arrived.
- Lambda reads the email from S3 bucket.
- Simple Email Service forwards it to a Gmail alias.
Let’s get started!
Verify my domain on AWS Simple Email Service
- Went to Domains within AWS Simple Email Service.
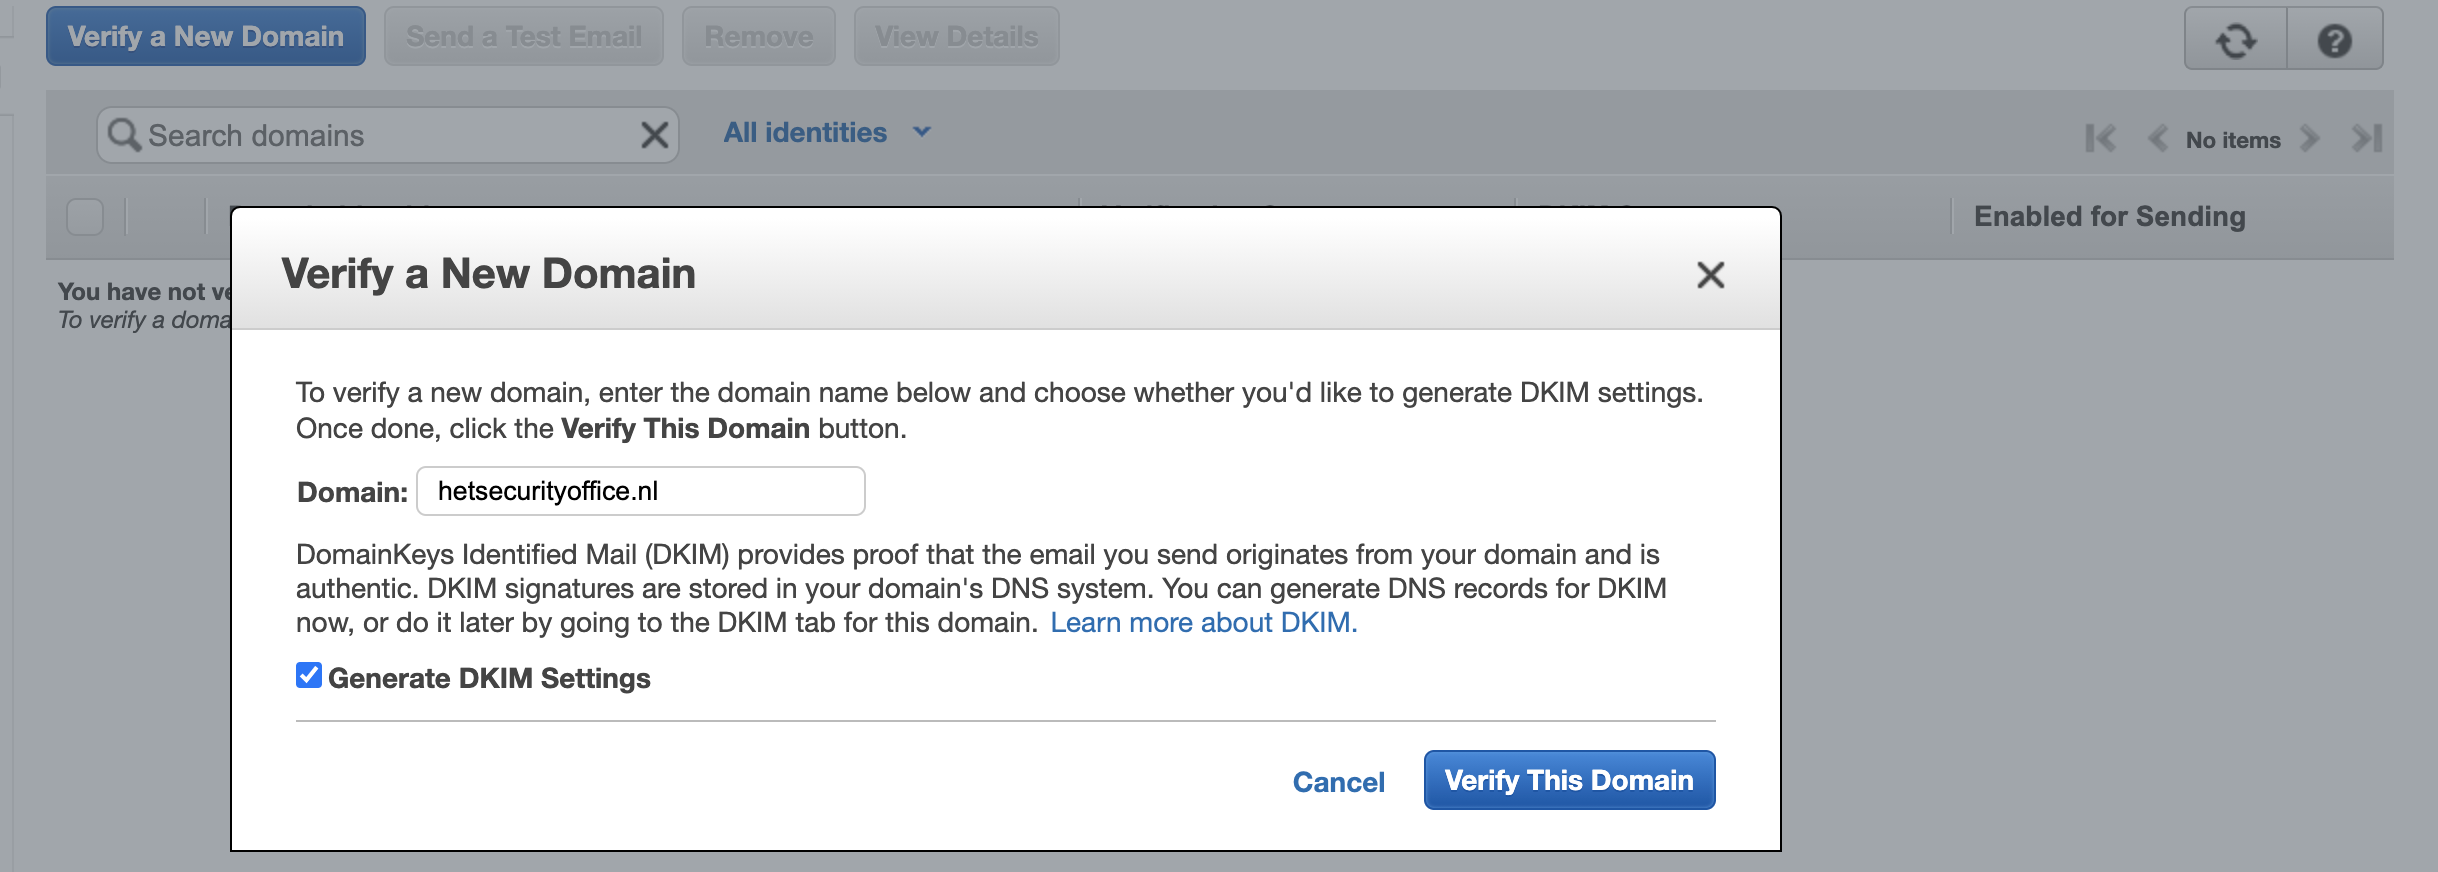
- Added the domain from which I’ll will be sending emails (i.e. hetsecurityoffice.nl) by
clicking on ‘Verify a New Domain Name’. Make sure to keep the ‘Generate DKIM Settings’ checked or check it.
- Added the just created domain records to the hetsecurityoffice.nl Hosted Zone in Route 53 by creating a new record for each of the domain records in step 2. An example below:
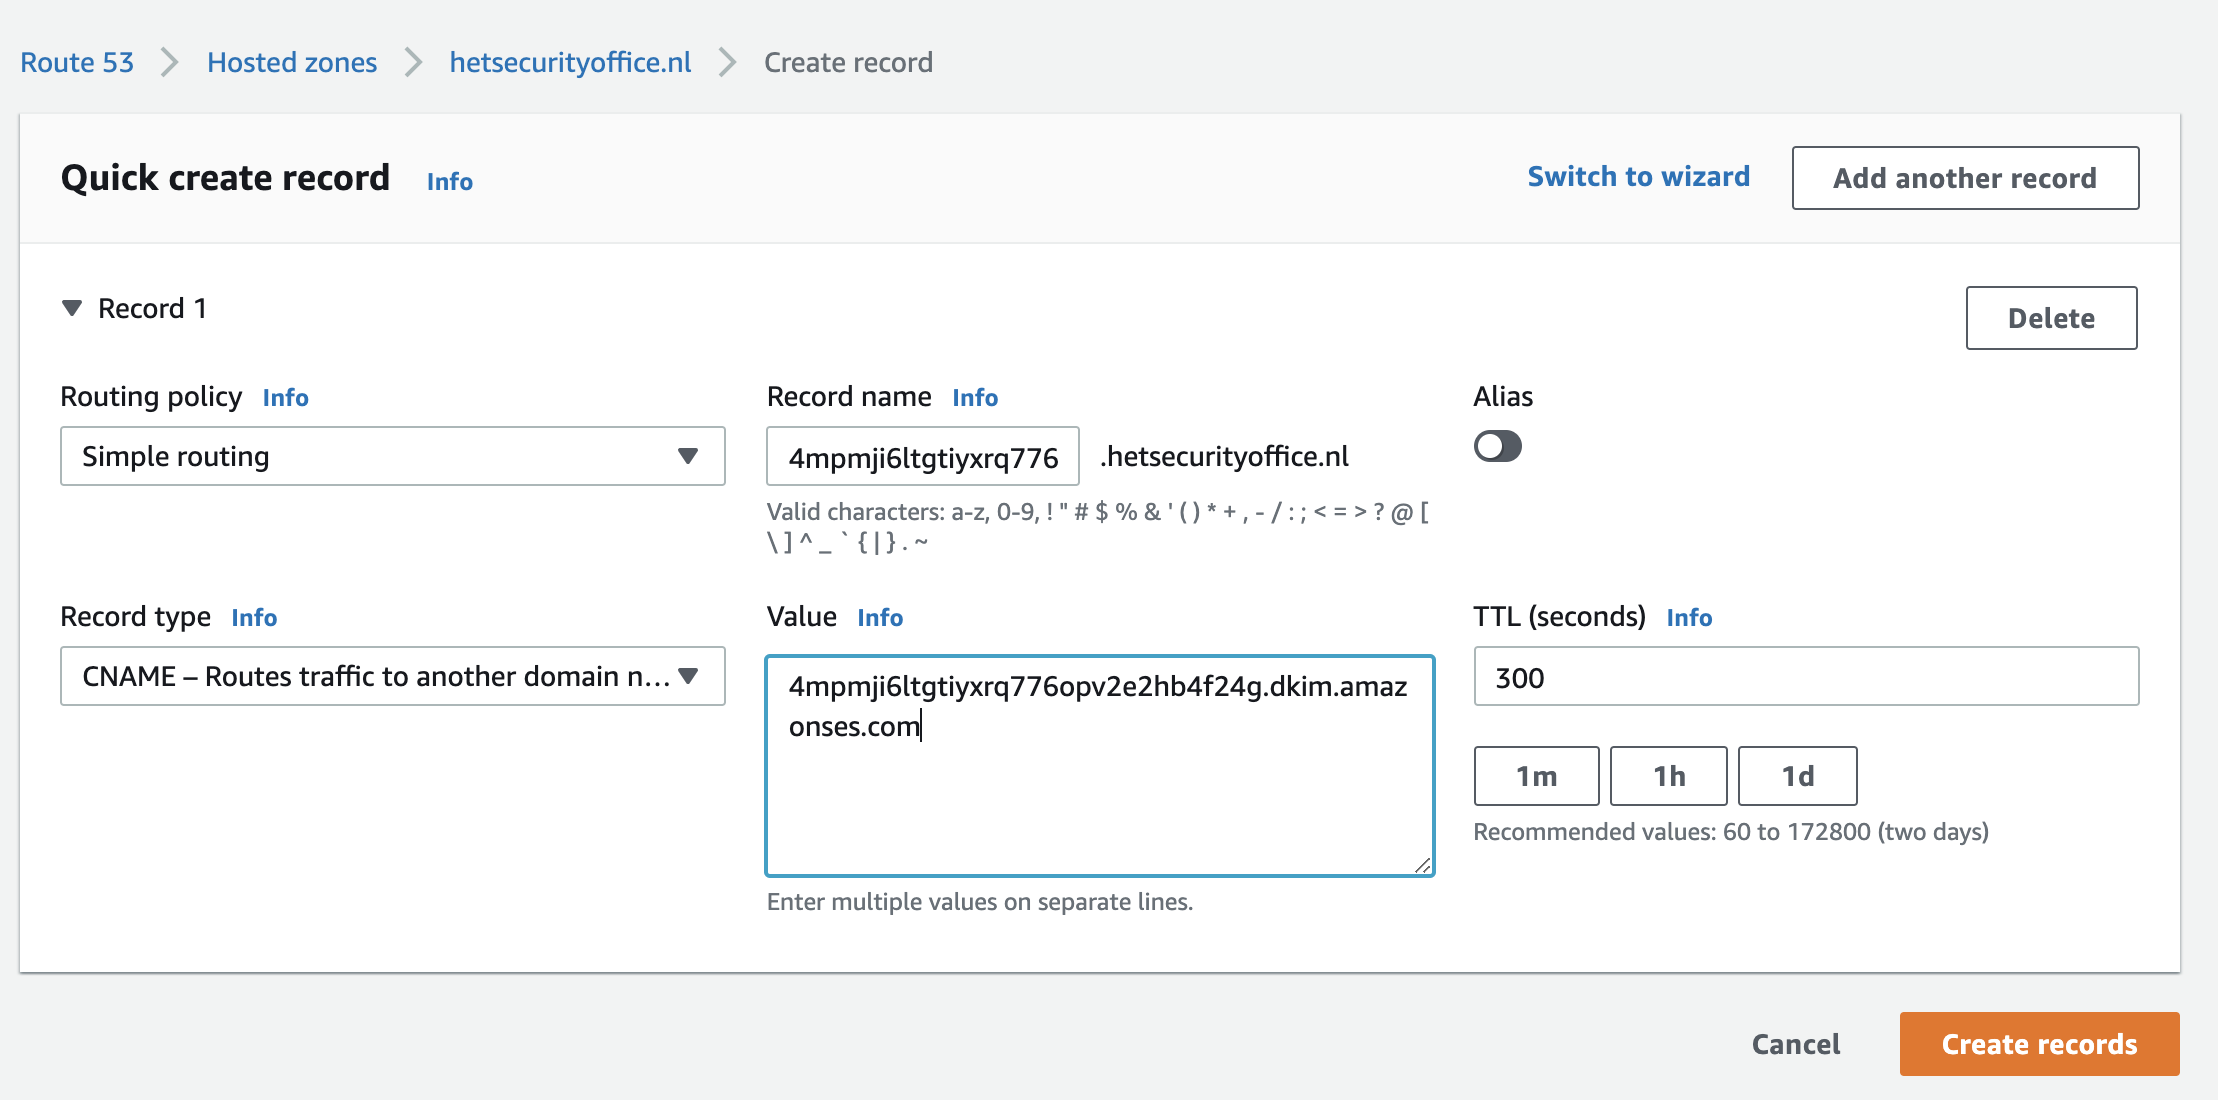
When AWS confirmed that these values were present in the DNS settings, the Status for the domain changed to “verified”.
Note: This may take up to 72 hours with certain companies but if you are using AWS Route 53 (Highly recommended) these should be verified in under 10 minutes.
Creating the S3 buckets to temporarily store emails
- Went to the AWS S3 Service and clicked on ‘Create bucket’.
- I’ve created a bucket with the name hetsecurityoffice.nl.mailbox. Versioning and public acces is disabled. I’ve enabled the default encryption with an Amazon S3 key (SSE-S3).
- Once the bucket was created, it was time to set the Permissions by setting a Bucket Policy. I’ve pasted the snippet below changing the S3 bucket name within resource and my ARN number within the Referer section.
{
    "Version": "2012-10-17",
    "Statement": [
        {
            "Sid": "AllowSESPuts",
            "Effect": "Allow",
            "Principal": {
                "Service": "ses.amazonaws.com"
            },
            "Action": "s3:PutObject",
            "Resource": "arn:aws:s3:::hetsecurityoffice.nl.mailbox/*",
            "Condition": {
                "StringEquals": {
                    "aws:Referer": "your AWS account ID"
                }
            }
        }
    ]
}
Creating the Lamba function to forward emails
- Went to AWS Lambda.
- Choose to ‘Author From Scratch’.
- Set the function name to ‘SESForwarder’ and Runtime to ‘Node.js 12.x’ and ‘Created the Function’.
- For the Lambda function code, I’ve copy and paste the contents of this index.js into the function code inline code editor.
- Changed the var defaultConfig section within the Lambda function code to the following code below and clicked on Deploy:
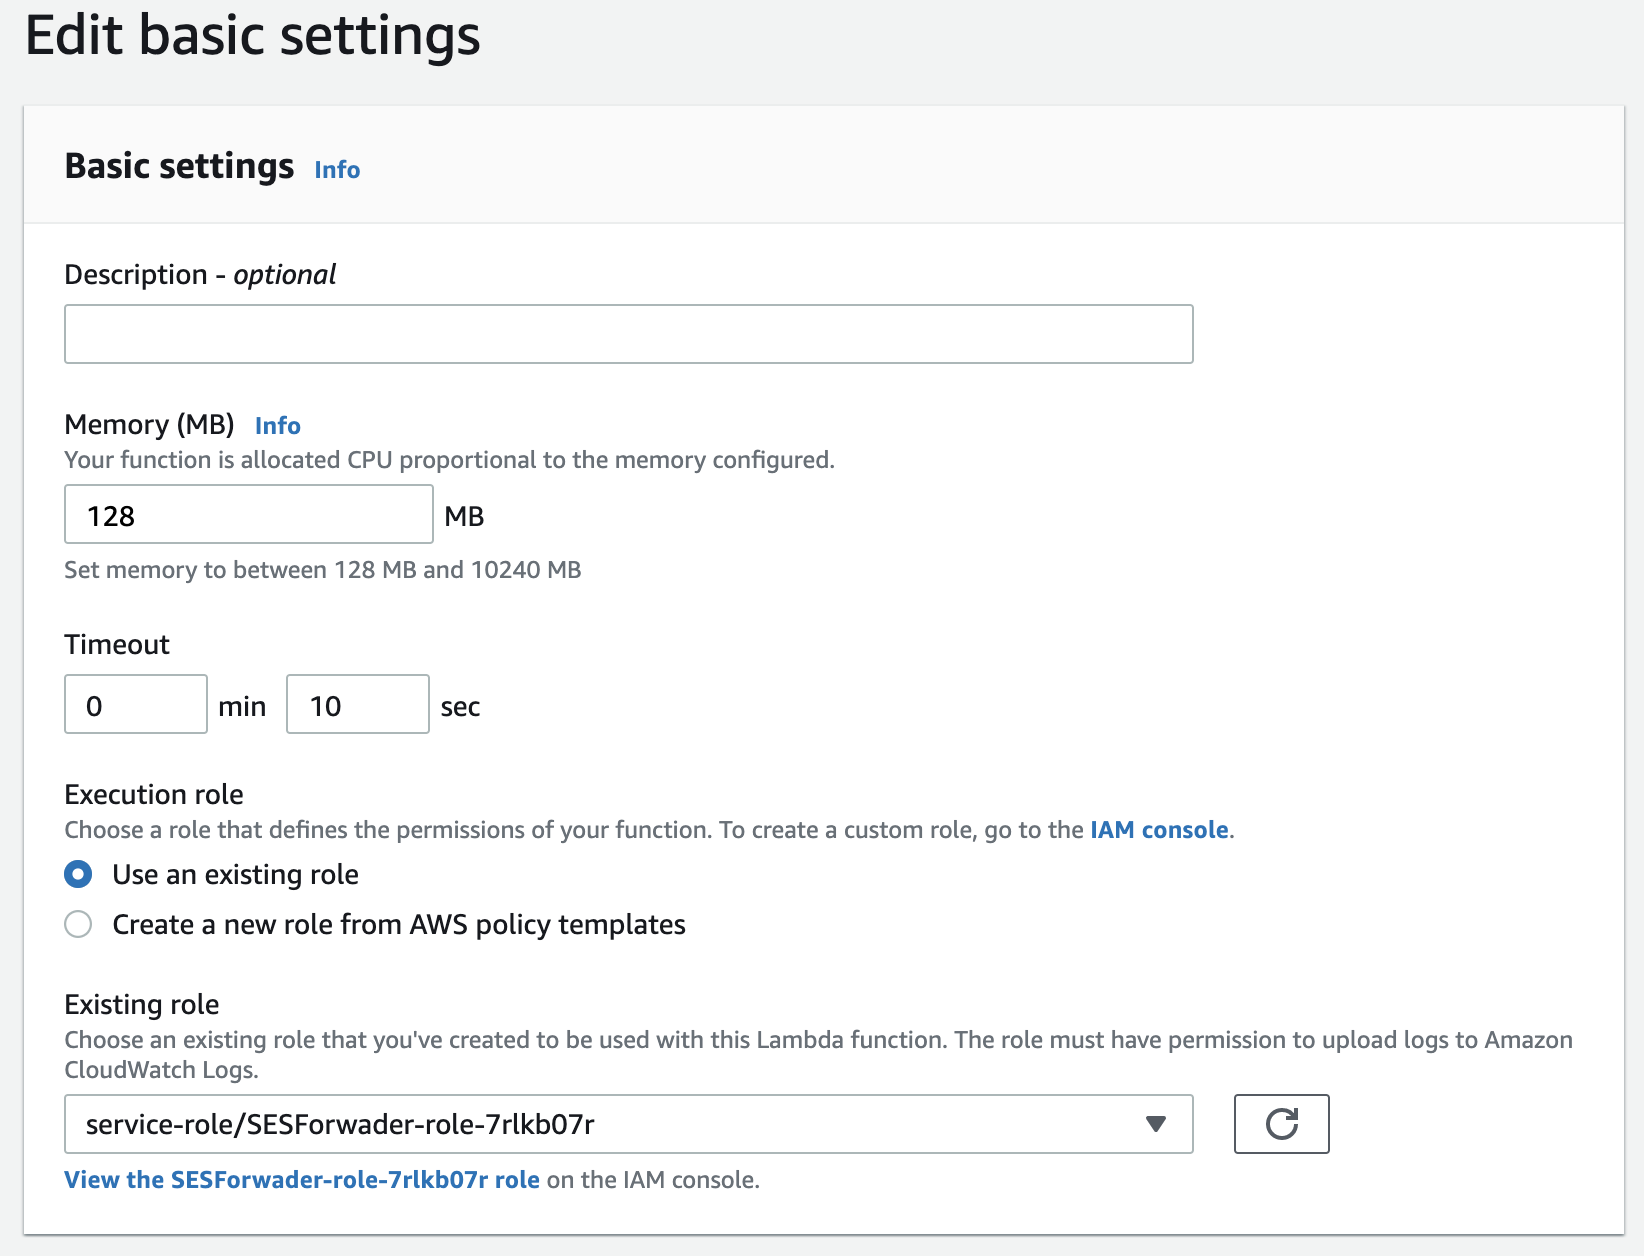
var defaultConfig = { fromEmail: "my Gmail address", subjectPrefix: "Lambda/SES", emailBucket: "hetsecurityoffice.nl.mailbox", emailKeyPrefix: "email/", allowPlusSign: true, forwardMapping: { "info@hetsecurityoffice.nl": [ "my Gmail address+hso-info" ], "abuse@hetsecurityoffice.nl": [ "my Gmail address+hso-abuse" ], "jeroen@hetsecurityoffice.nl": [ "my Gmail address+hso-jeroen" ] } }; - I’ve changed the Timeout to 10 seconds in Basic Settings of the Lambda function.
Setting permissions for the AWS Lambda function
- Went to IAM Roles
- Opened the SESForwarderRole and the AWSLambdaBasicExecutionRole under Permissions.
- Clicked on ‘{}JSON’ and edited the Policy to:
{
 "Version": "2012-10-17",
 "Statement": [
    {
       "Effect": "Allow",
       "Action": [
          "logs:CreateLogGroup",
          "logs:CreateLogStream",
          "logs:PutLogEvents"
       ],
       "Resource": "arn:aws:logs:*:*:*"
    },
    {
       "Effect": "Allow",
       "Action": "ses:SendRawEmail",
       "Resource": "*"
    },
    {
       "Effect": "Allow",
       "Action": [
          "s3:GetObject",
          "s3:PutObject"
       ],
       "Resource": "arn:aws:s3:::hetsecurityoffice.nl.mailbox/*"
    }
 ]
}
Creating a new rule for received emails
- Went to Recipient Rules and clicked on Create a Recipient Rule.
- Specified the Recipient email address I’ve configured previously within the defaultConfig of the Lambda function.
- In Actions I’ve set the previously created S3 Bucket, specified the ‘Object key prefix’ to email/ and added the previously created Lambda function as action
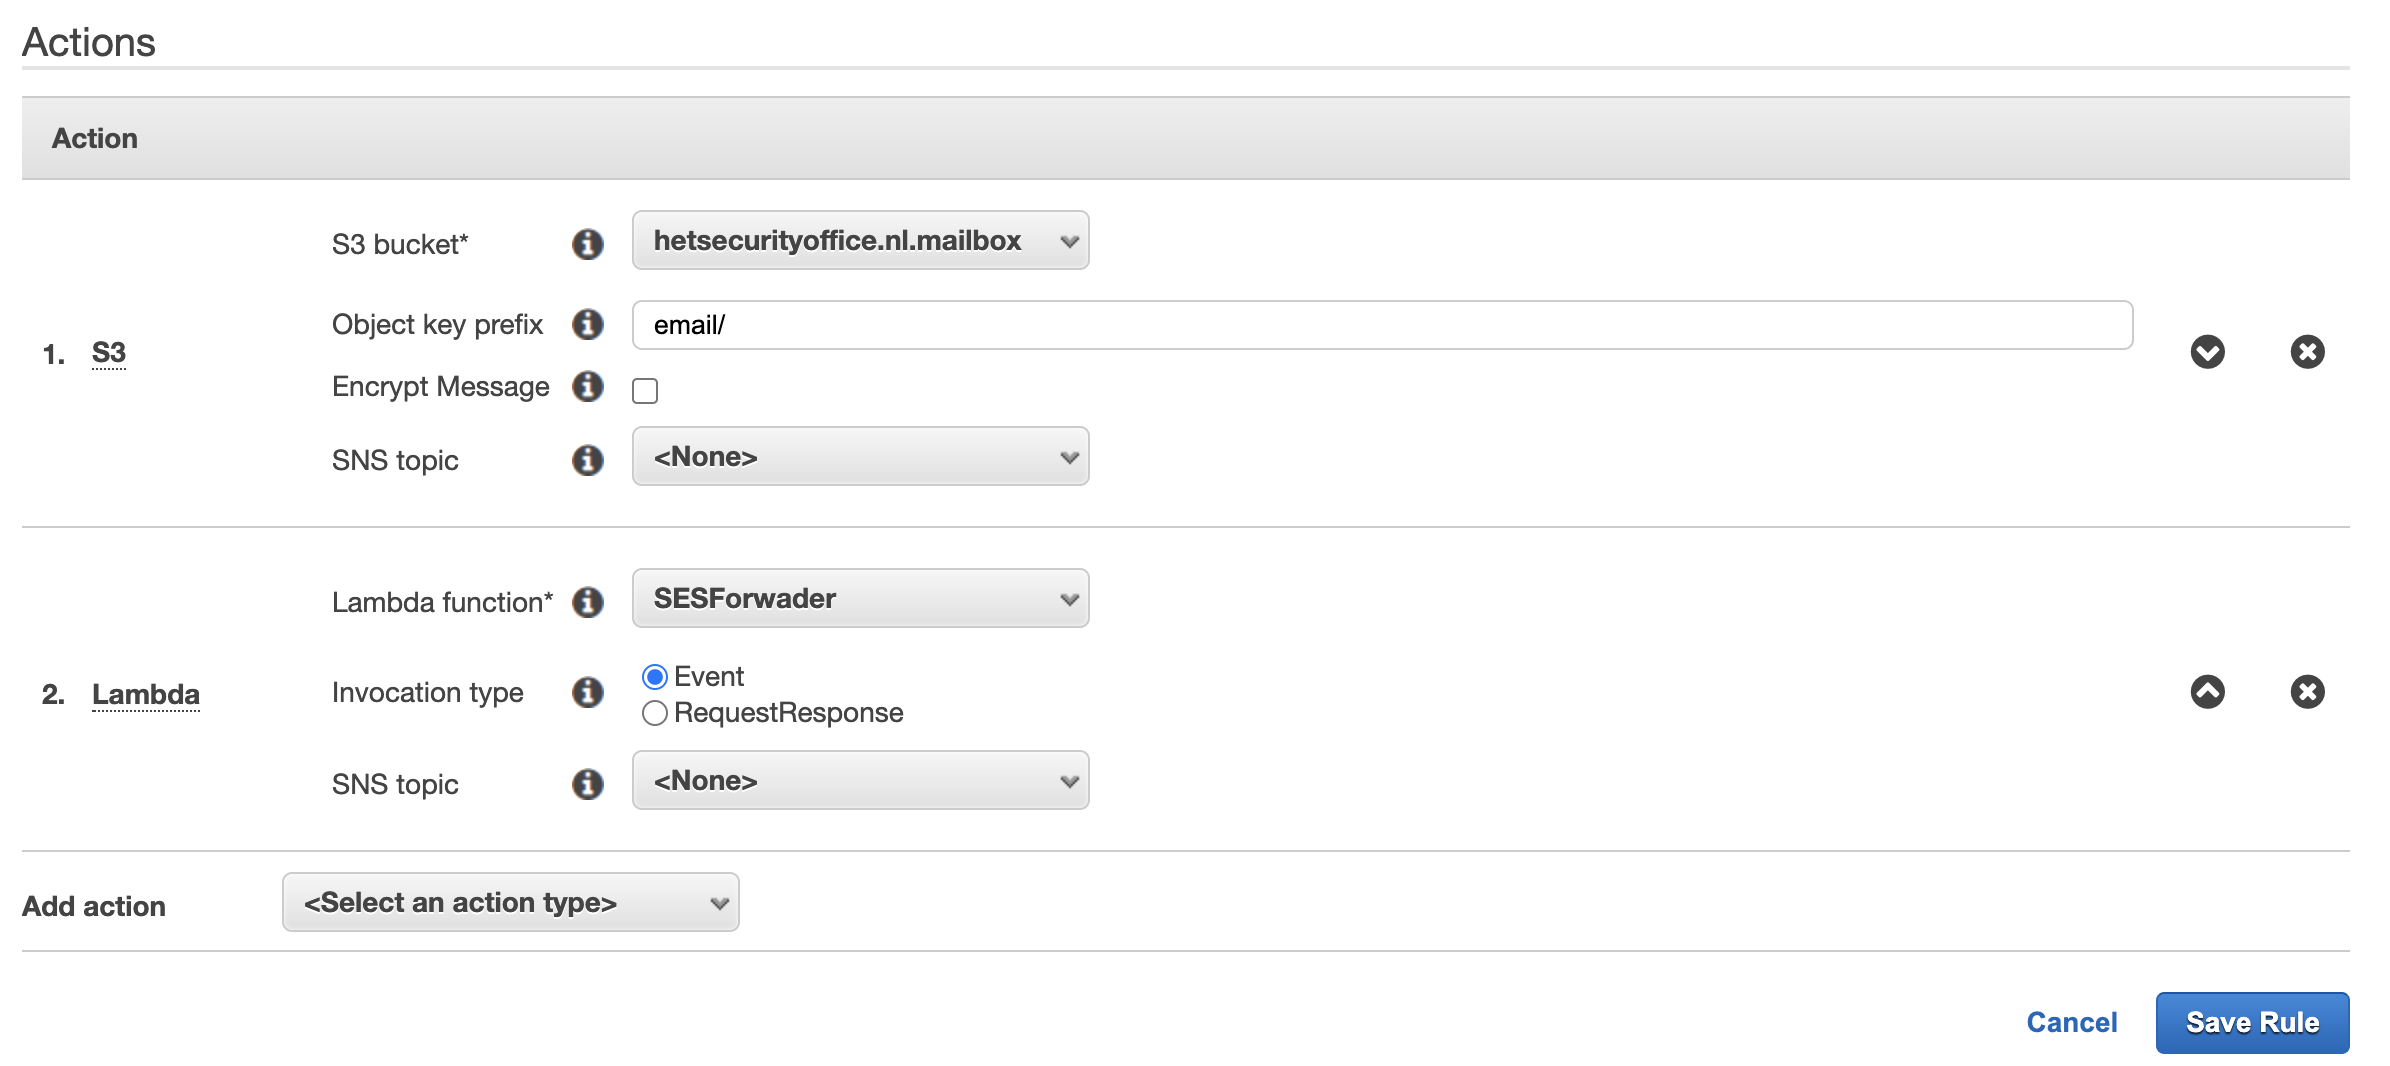 Note: Encrypt Messages is disabled. This is not S3 Server side encryption (SSE-S3), but client side encryption that’s applied by SES. This will make decrypting the messages very hard. I’ve chosen to enable encryption of objects (the emails received) when they are stored in the S3 bucket and implement a lifecycle policy to remove stored emails on S3 after 24 hours.
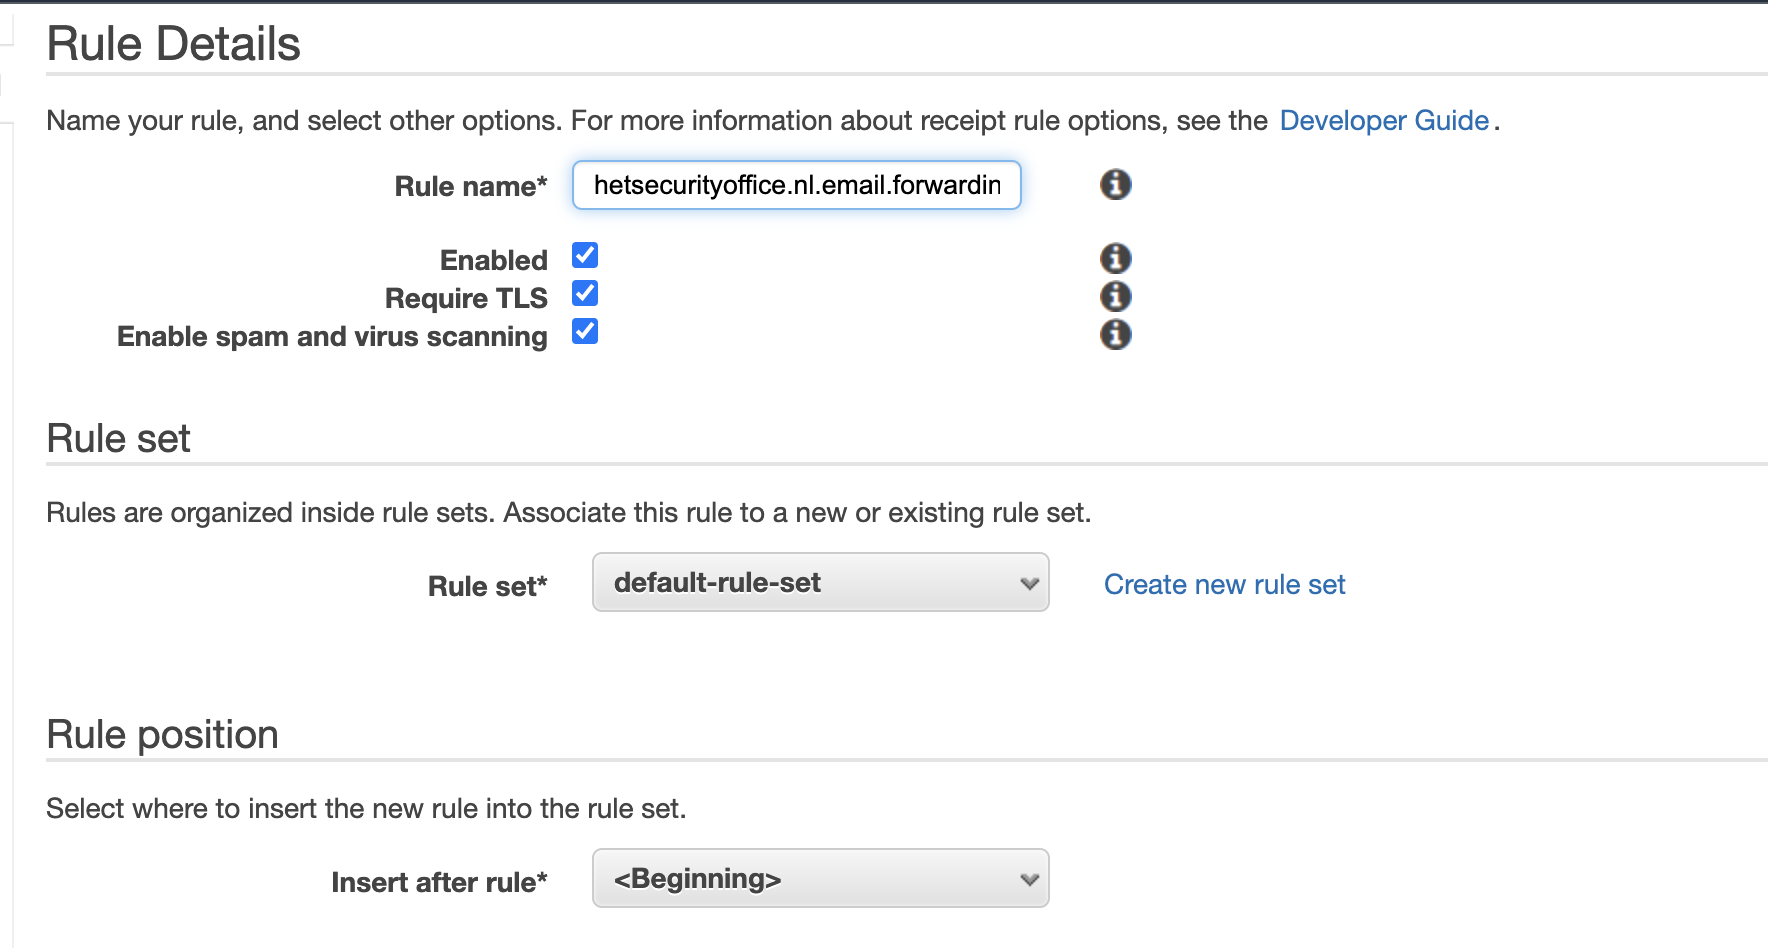
 - Specified a logical rule name i.e.: hetsecurityoffice.nl.email.forwarding and enabled Require TLS.
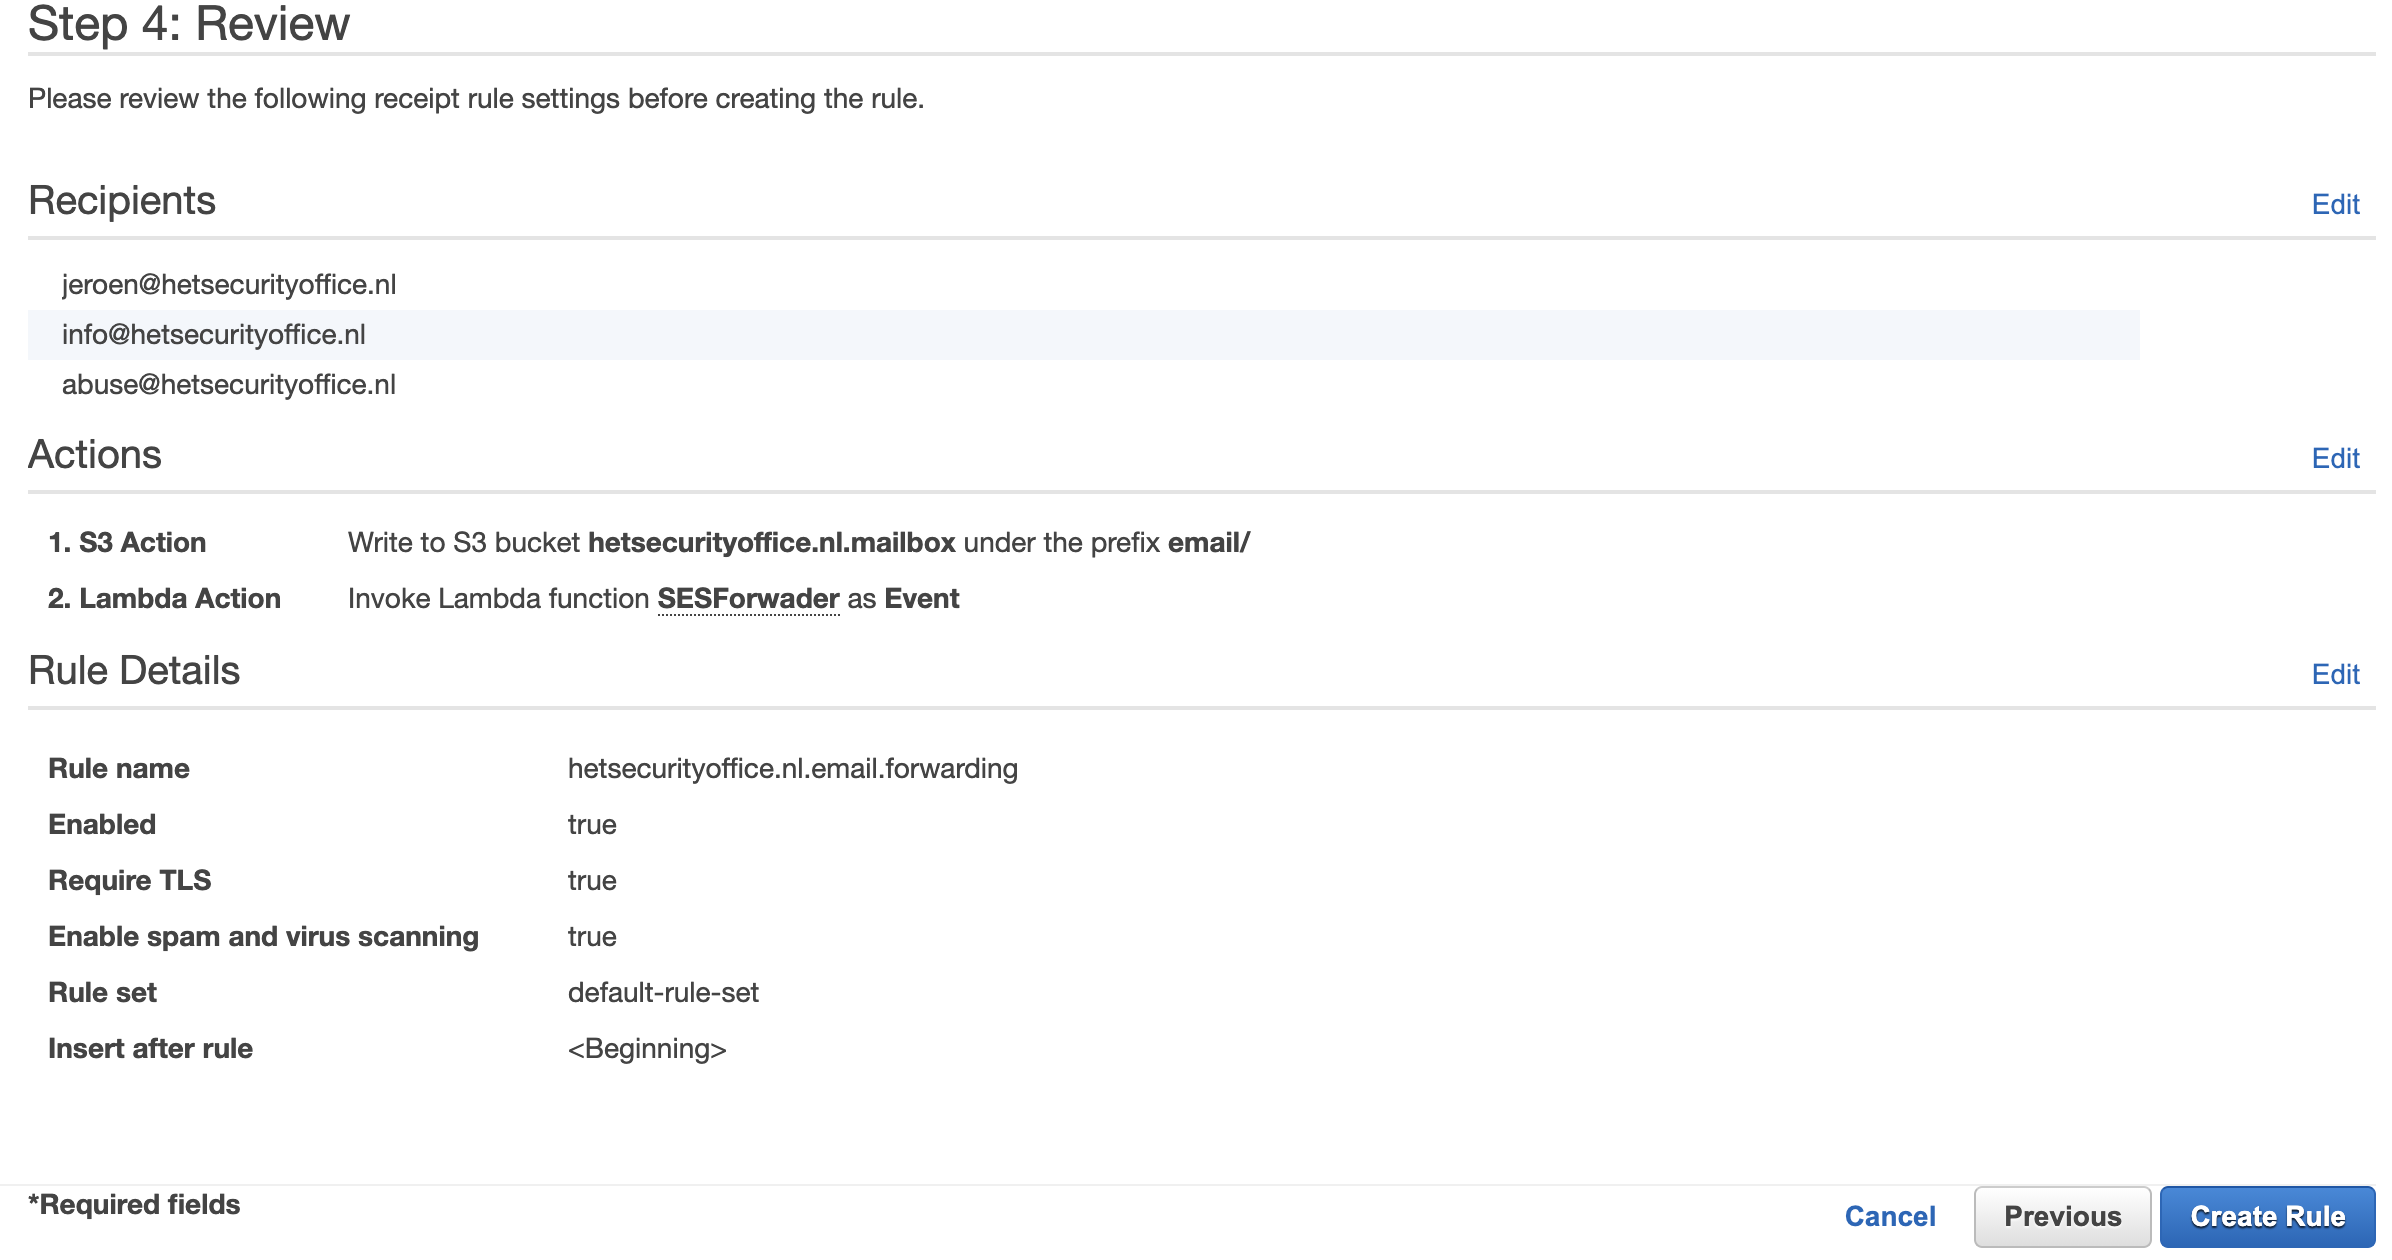
- Reviewed the receipt rule and created the rule.
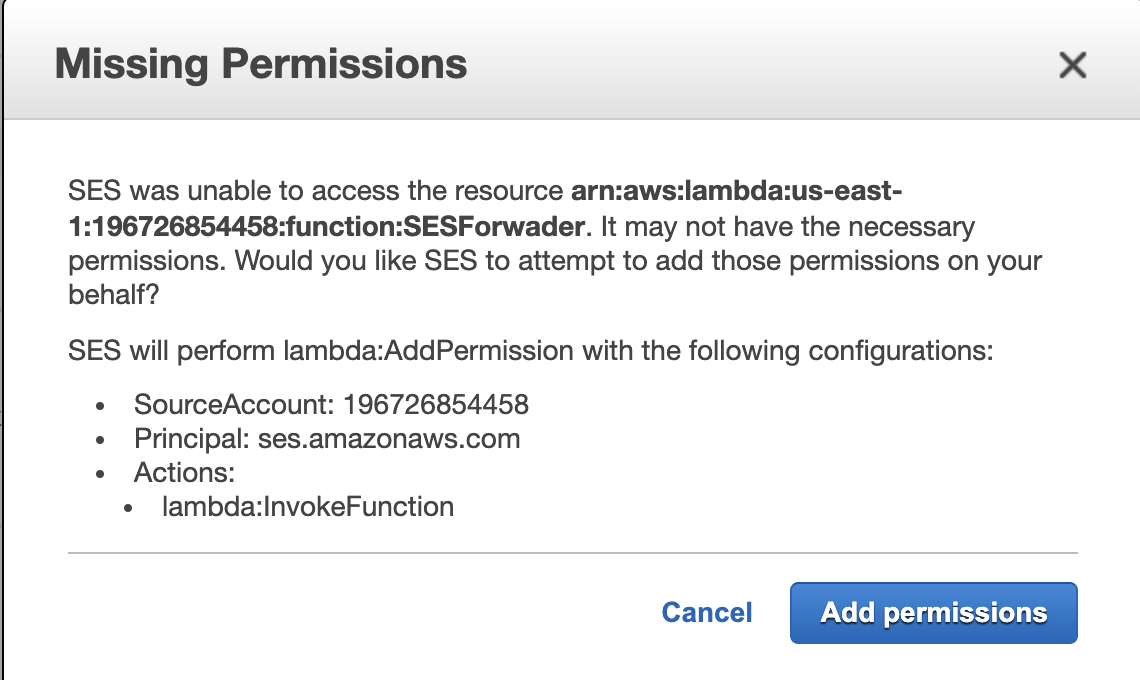
- Created the missing permissions that AWS prompted me with so that SES could invoke the created Lambda.
In order for Amazon SES to accept outgoing e-mail from Gmail it is necessary to verify your email address (and all of the aliases you want to use) and create a SMTP user.
I’ve started with creating a SMTP user.
Creating a SMTP user
- Went to SMTP Settings
- Wrote down the server details (host and port) since I’ll be needing them later
host: email-smtp.us-east-1.amazonaws.com ports: 25, 465 or 587 - Clicked on ‘Create My SMTP Credentials’ and followed the on-screen instructions to create a logically named IAM SMTP username and password. I’ve saved the credentials for later use in LastPass.
Creating the Gmail aliases
- I followed this guide to setup all the Gmail aliases I’ve configured previously within the defaultConfig of the Lambda function.
Verifying my Gmail addresses and aliases
Since we are still in a Simple Email Service sandbox environment, I needed to verify my email address in which mail will be sent to.
- Went to Email Addresses then verified my Gmail address.

- Repeated above step for all of the required Gmail aliases. See the addresses I’ve configured previously within the defaultConfig of the Lambda function.
Setting up the SMTP server within Gmail
To be able to reply from the hetsecurityoffice.nl domain I needed to setup the SMTP server of AWS within Gmail.
- Went to Gmail’s Account & Import
- Clicked add a new email address under the “Send mail as” section.
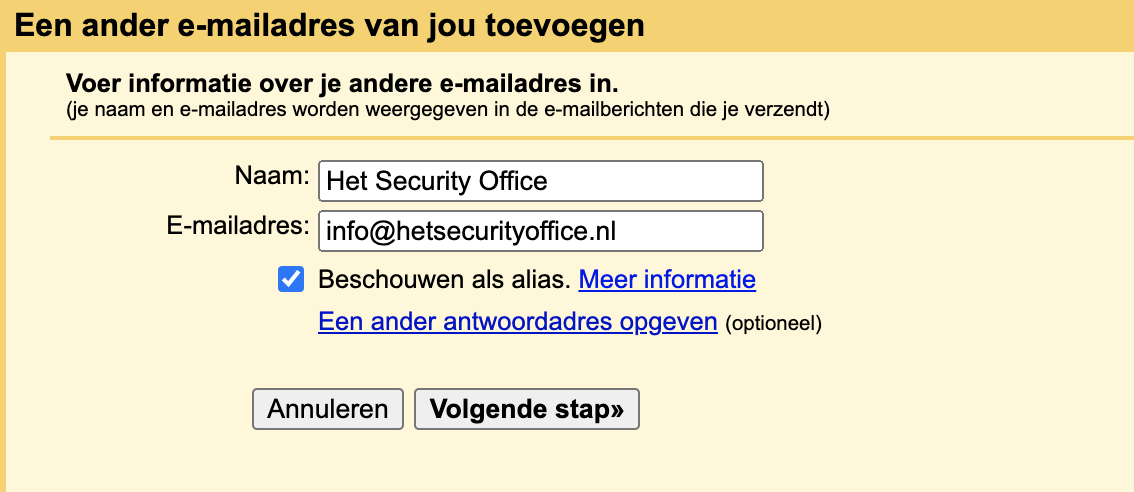
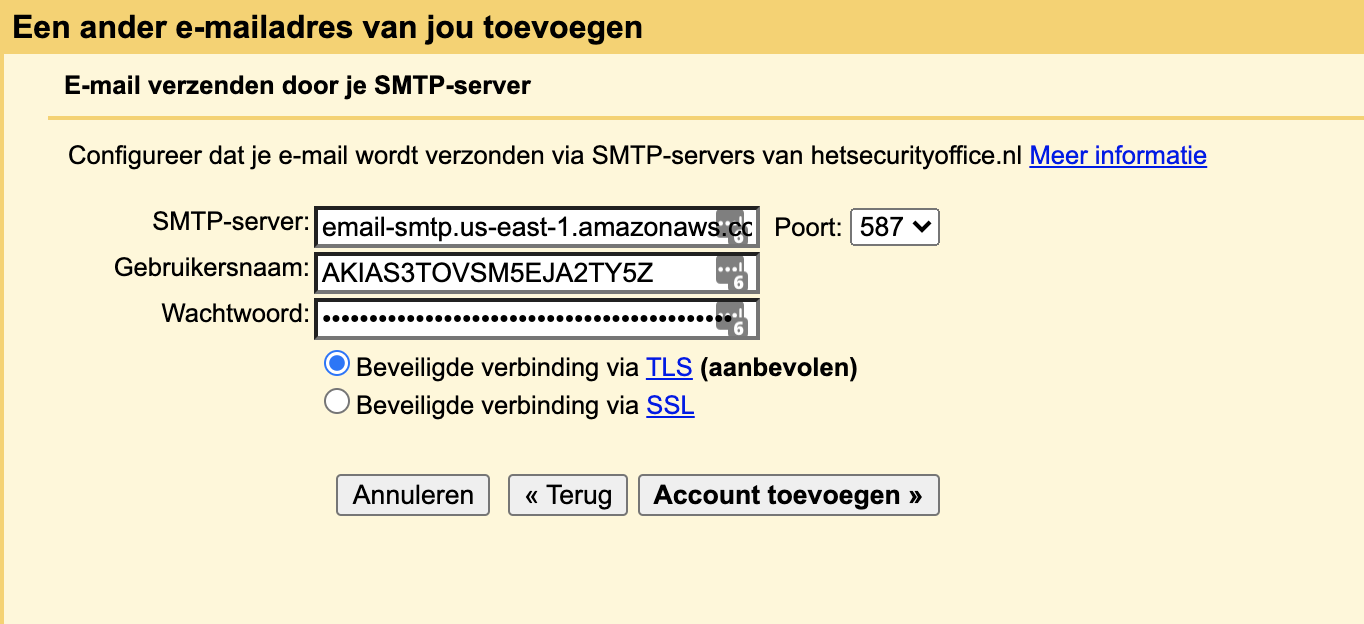
- Changed the SMTP server to the server we previously noted down.
- Changed the username to the STMP username we previously noted down.
- Filled in the password of the STMP username we previously noted down.
- Filled in the verification code Gmail just send to the hetsecurityoffice.nl email address.
I can now reply from within Gmail with a hetsecurityoffice.nl email address.
